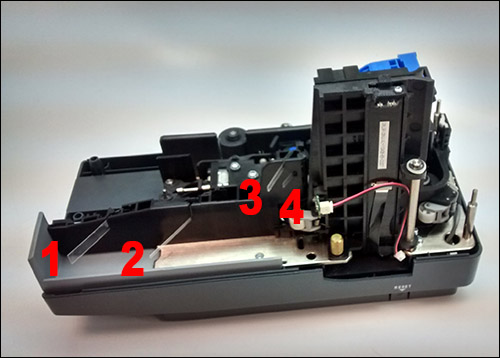
It isn’t a subject that comes up very often, but you might be interested to know that certain models of Digital Check scanners contain anywhere from one to five Mylar tabs in the paper track. These tiny strips of plastic do several important jobs in the scanning process, but we’re willing to bet that most of our customers aren’t even aware they exist at all!
The main reason why customers usually “find out” about these tabs is because someone pulled them out of the scanner’s frame, thinking they were packaging material that was supposed to be removed. (It’s similar to another problem that we see sometimes with the image sensor cables on some of these same models, especially the CheXpress CX30.) It’s worth reiterating: Digital Check products NEVER come with tape or tabs inside the device that need to be removed. If it feels like it’s attached to the scanner, don’t pull on it!
So, what’s the reason for these little tabs? It depends on which scanner model they’re on, and also where they’re located. Generally, though, their purpose is to gently guide the paper in a certain direction as it passes through the track.
The most visible place you’ll find these Mylar strips is in the exit path of the TellerScan TS240 (see image above), where they nudge the outgoing checks toward one side of the collection pocket. That keeps the documents neatly stacked in the same order in which they were scanned. With nothing to guide the outgoing checks, they’d land out of order – but it’s important that this process uses a material that’s flexible enough to provide gentle resistance. Too much pressure, and the guides would start causing problems as documents accumulated in the exit pocket; the thicker the stack got, the better odds that the next check would get stuck.
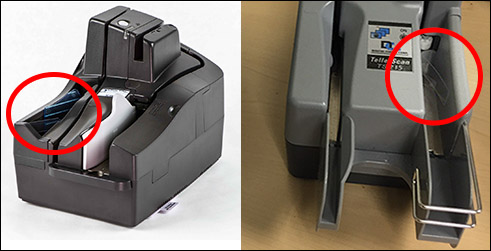
The TS240, as well as earlier models of the TellerScan Series (such as the TS215 pictured at right), used Mylar strips as guides in the exit pocket, but there’s more than one way to solve that issue. Our SmartSource series scanners use a piece of rigid plastic on a hinge to direct the paper, as does our newer TellerScan TS500. That model also retains a single Mylar strip, but it’s further down toward the end of the exit pocket as more of an auxiliary guide, to help keep the finished checks from “fanning out” at the end.
There are a few other places where you’ll find these Mylar strips used for different purposes. Some versions of the TellerScan TS240 have an additional guide near the mouth of the input tray to make deep staging more difficult (this is a fancy way of saying “shoving checks too far into the feeder”). This tab is small and hard to see without taking the covers off, but it plays an important role in preventing paper jams. As part of our continuous improvement process, some more recent models have done away with this tab in favor of a redesigned frame that makes deep staging almost impossible unless it’s done deliberately.
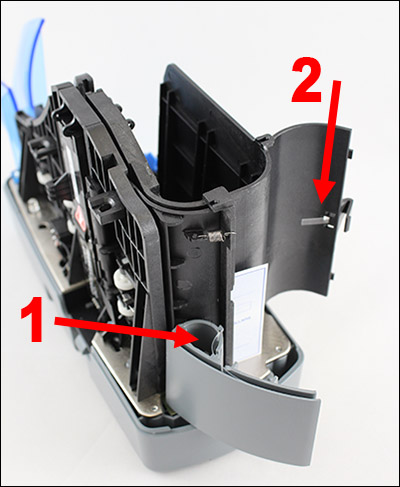
As a single-feed scanner, the CheXpress CX30 doesn’t need guides in the same way as multi-feed models, but it does make use of a few. On units with inkjet endorsers, a very hard-to-see tab near the feeder keeps the check pushed toward the side of the track that has the endorser, and away from the excess ink collection pad on the opposite side. Other tabs keep the checks from going crooked at the end of the paper track once they are out of range of the rollers – either as they exit through the rear slot (in pass-through mode), or inside the device (in feed-and-return mode).
Even though they’re small and light, the Mylar strips don’t wear out. Their expected lifespan is several times that of the scanner itself – the only reason we really get repair requests for them is the occasional case where somebody broke one off by him or herself. For that reason, we don’t carry them as standard replacement parts. While replacing a broken tab is not exceptionally difficult if you have nimble fingers and some patience, sometimes getting the parts can be a problem, so please be careful!


