(And How Mars Global Surveyor Became the Biggest Scanner in the Solar System)

This Sunday, May 30, 2021, marks exactly 50 years since the launch of NASA’s Mariner 9 probe. Besides its historic achievement as the first spacecraft to orbit another planet, this was the first of several interplanetary missions for which Digital Check’s predecessor company, Electro-Optical Mechanics, made the cameras on the ground that converted the image data sent back by the Mariner and Viking missions from binary data into visible photographs.
But those cameras never left the room, much less the atmosphere. Much different camera technology was at work on board the spacecraft, though, resulting in a unique melding of analog and digital imaging techniques. And over the next two decades, the optical technology on future Mars missions would evolve into forms that were unexpectedly similar to what you might find inside a scanner today.
The image conversion cameras used on the ground at NASA’s Jet Propulsion Laboratory (JPL) were high-precision analog devices that transferred the probe data onto 5-inch-wide film. And, in fact, some early space probes that orbited the Earth, as well as crewed space exploration missions, also took pictures using regular film that was later retrieved and developed. Needless to say, that wouldn’t be possible for a spacecraft that traveled millions of miles away, never to return. So, the Mariner missions had to find another way to capture image data and send it back to Earth.
Made for TV

The devices carried by the Mariner probes were called “television cameras,” although that probably means something a little bit different than what you would think of if you pictured a TV camera today. When the spacecraft were being designed back in the 1960s, there were basically two ways you could take pictures. One was to capture them on film, whether that meant taking still photos or using a movie camera. The other way was with a television camera, which used technology descended from cathode ray tubes to turn incoming light into an electrical signal, which could then either be displayed directly or stored on magnetic tape.
In a sense, TV cameras could be called some of the very first digital cameras, since they did not rely on film exposure as the means of making an image. However, to call them the same thing as “digital cameras,” in the sense we know them now, would be a bit like lumping modern laptops in with the gigantic mainframe computers of the 1960s. That distinction would affect what kind of equipment could be used aboard interplanetary spacecraft, as we’ll see.
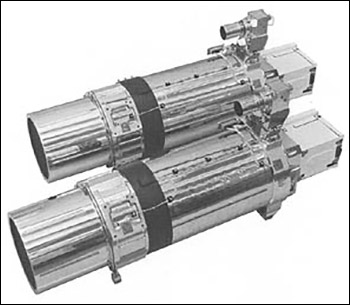
The television cameras at the time of the Mariner missions used image pickups called vidicon tubes, which were some of the last tube-based cameras before solid state image sensors rendered that technology obsolete. While the cameras on probes weren’t used for making live-action video, like we tend to associate with the term “television camera,” their shape and bulk resembled an old studio camera and used the same technology.
In the very weight-sensitive realm of rocket payloads, though, the cameras’ size was such that the first probes in the series, Mariner 1 and Mariner 2, did not carry cameras at all, because the extra mass would have put the craft over the limit of the upper-stage boosters that were available at the time. Not until the Mars flyby of Mariner 4, which used an improved upper-stage booster, was a photographic camera installed; the Mariner 5 mission to Venus also had its cameras removed in favor of other instruments. The same types of vidicon tube cameras were used for the rest of the Mariner program, including the Mariner 9 and Mariner 10 missions in which our own conversion cameras took part.
Where Analog Met Digital, a Bottleneck
The different mission profiles of Mariner 9 and Mariner 10 exposed an interesting limitation of the probes’ recording equipment that led their imaging teams to handle the missions differently. The probes’ antennas were capable of transmitting data back to Earth at the then blazing-fast rate of 117.6 kbps – a speed that wouldn’t become available to home Internet users for almost another 30 years. However, the magnetic tape recorders on the probes could only play back data at a much slower 22 kpbs. (It’s also worth noting that Mariner 10’s camera had about triple the resolution of Mariner 9’s, further adding to the playback bottleneck for that craft.)
The playback speed wasn’t a problem for Mariner 9 – since it was parked in Mars orbit, it could take photos until the reels were full, transmit them back to Earth at its leisure, and then take some more. But Mariner 10, sent to study Mercury and Venus, did not go into orbit around either planet, but did a series of flybys past both.
Since there was only one chance to snap images on each pass, time was of the essence. Rather than recording and playing back the images, the crews had Mariner 10 transmit many of its photos immediately, to take advantage of the transmitter’s full 117.6 kbps bandwidth. That allowed them to take almost six times as many images in the limited time available for the flybys, albeit at a cost of some increased signal noise. For that reason, during much of the mission, Mariner 10’s cameras snapped photos at the relatively odd interval of one frame every 42 seconds – the length of time it took to transmit the previous photo back to Earth.
Designing the Biggest Scanner in the Solar System

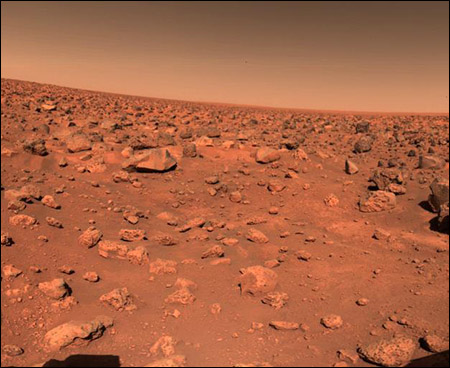
While the Viking missions brought higher-quality vidicon tube cameras to Mars, the landers also used a different technology: the facsimile camera. These cameras used photosensitive diodes to capture light in one-pixel-wide slices, and had a mirror that rotated slightly with each exposure to point toward the next slice. You might notice that, in NASA’s Viking photo galleries, many photos have the same vertical dimension of 512 pixels, but varying widths depending on how many rotations the sensor made. This was an example of early line-scan image capture, similar to what scanners or fax machines would use to scan paper. Only in Viking’s case, instead of the camera staying stationary while the object moved past it, the object (Mars) remained stationary, and the camera adjusted its view in one-pixel increments. At five lines per second, it could take a facsimile camera several minutes to capture an image, but this technique also enabled some of the spectacular panoramic shots that were beamed back from the Red Planet in the 1970s.
Incidentally, a problem with the Mariner 9 camera inspired a future change in camera design, which effectively turned the failed Mars Observer, and its much more successful follow-up, the Mars Global Surveyor, into the biggest scanners in the history of the Solar System. Early in the Mariner 9 probe’s stay at Mars, the main camera’s color filter wheel became stuck, leaving it able to capture only black-and-white images for the rest of the mission. To avoid a potential repeat of that mishap, engineers on the Observer project designed a camera with no moving parts at all.
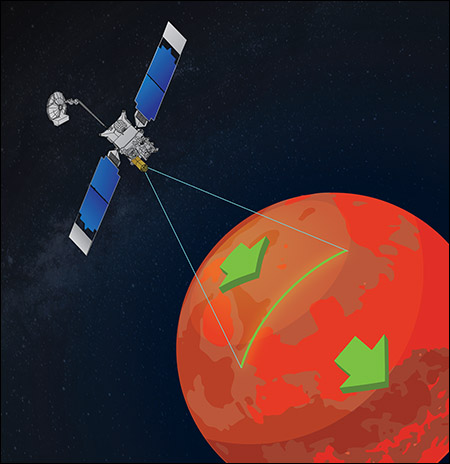
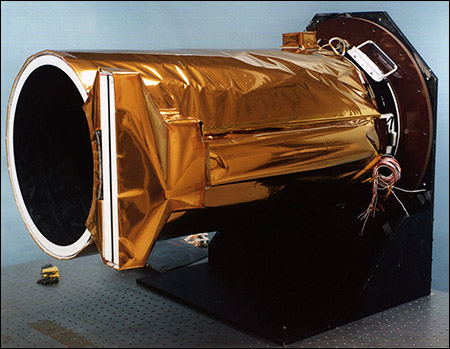
In similar fashion to a modern scanner, the Mars orbiter cameras used a line of charge-coupled devices, or CCDs, to capture single-pixel slices at a time. But instead of moving the camera optics to capture the next line of pixels like Viking did, the Global Surveyor used its own motion as it orbited the planet – capturing another slice every time Mars’ surface “moved” one pixel’s width underneath the satellite.
The type of “pushbroom” camera used on the MGS mission is similar to tracked line-scan cameras commonly found in industrial settings. The same type of image sensor has since been used on several other orbital space probes, including the Mars Reconnaissance Orbiter that is still sending back data today.
Besides containing no moving parts, another advantage these cameras had was the ability to capture photographs in adjustable dimensions. While a traditional camera would take pictures of fixed size and resolution, the line-scan technique allowed the device to keep photographing until it filled up the system’s memory buffer. In the case of MRO, that means the probe could theoretically take a contiguous photograph up to 300km long, although this was seldom done.
Present and Future – A Balanced Approach

Of course, line-scan photography is only one way to take pictures in space, and most interplanetary probes since the 1990s have used a mixture of pushbroom and “regular” area-array cameras. That includes the MRO – which has a traditional camera mounted alongside the line-scan version – as well as more recent spacecraft such as the New Horizons probe that visited Pluto and the outer Solar System.
One thing that’s changed for the better since the days of Mariner and Viking is that beamed-back images no longer need to be transferred to film in order for researchers to work with them, thanks to advances in digital storage and display technology. On the other hand, some proven techniques such as CCD photography have stood the test of time, and remain the preferred way to capture the highest-quality images.
With the renewed interest in Mars exploration lately, it’s easy to think of the Red Planet as familiar territory – especially with stunning new images and news of impressive achievements arriving almost daily from multiple missions at once. Fifty years ago, though, things were much different; and each tentative step forward represented something that had never even been tried before. On the eve of this important but long-forgotten anniversary, we hope you’ve enjoyed this look back at how we got there, and at how optical technology has risen to meet the challenges of yesterday and today.


