Of course, when your scanner gives you a warning message that looks like there’s a paper jam, in 99% of cases the cause is, in fact, simply a paper jam. Occasionally, though, it’s a different problem that can be solved with a simple cleaning.
This particular issue starts out looking like a ordinary jam – basically, the scanner keeps getting “stuck” – and the usual remedy is to hold down the power button for two seconds, which in turn runs the motors and expels most jammed documents. For especially stubborn jams, sometimes it’s necessary to open the side cover and pull out the document (or pieces of the document) by hand.
But what if you’ve tried both of these fixes, there’s no paper in the track, and the scanner is still acting like it’s jammed? In that case, a cleaning may be in order.
SmartSource scanners use four different sensors to figure out where the paper is during the feeding process – one in the input hopper, two right after the feeder intake mechanism, and the then the image sensor itself, which captures the check image. To make a long story short, when any of these sensors become obscured with too much dust or debris, it can register as a document stuck in the track.
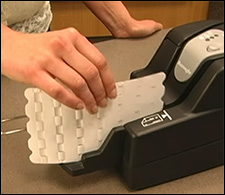
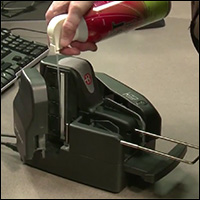
When this problem occurs, the most common error messages you’ll see are “LE (leading edge) arrived too early at rear image camera,” or “LE arrived too early at front image camera.” In plain English, this means that when the feed mechanism is supposed to be pulling a new document in, the image sensor is detecting a piece of paper already present toward the end of the track, so it shuts down to avoid feeding two pieces of paper on top of each other. When it’s not explained by an actual paper jam, try running a Digital Check cleaning card through the track several times as shown in our “Simple Cleaning” training videos. If the problem persists, you may try blowing out the scanner track with a can of compressed air, or as a final step, wipe down the sensor glass itself with an alcohol wipe or a tissue damp with Windex, as shown in our “Detailed Cleaning” videos. Whatever you do, DON’T spray Windex directly on the glass; spray it on the tissue.
[note: Sometimes, the scanner may refuse to feed a cleaning card through, because the error stops the feed process immediately. In these cases, try wiping the image sensor glass as described above. You may also try manually wiping the sensors in the paper track – see your user manual for instructions on this.]
Don’t feel bad if you’ve been stumped by this problem – even our own support team was caught off guard the first few times it happened. Just remember: When in doubt, try cleaning the scanner first. It is perhaps the single most important piece of maintenance you can do, and this is another example of the old saying: “An ounce of prevention is worth a pound of cure.”